Full-Body Circuit Workout — Without Equipment Needed!

Source : fitsugar.com


1.
|
Push
Up
|

When
you do push up position, hold this pose for longer. It will strengthens your upper body and targets your core.
When
you’re going down, exhale and bend your elbows, allowing them to brush
against the sides of your body as you lower your torso toward the floor. Stop
when your upper arms and body are parallel with the ground.
Hold here
for five deep breaths. Do this for five reps.
|
|
2.
|
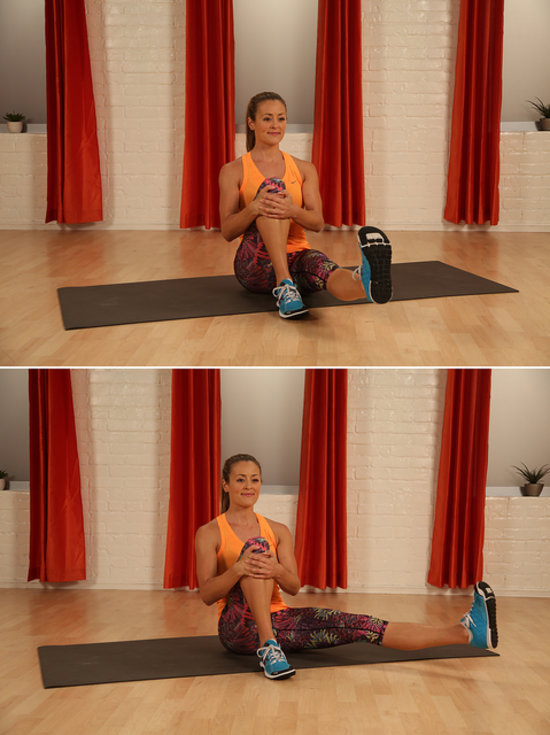
Boat
|

Sitting
and lift your knees up to your chest. Balance on your sits (bottom of your
pelvis). Keep your spine as long and
straight as possible.
Slowly
straightening your legs up. If your back starts to hunch, keep your knees
bent. Hold for five deep breaths.
When
you’re ready to take the lift. Cross your legs just below your knees, point
through your toes and pull them in as close to your body as possible, without
letting them touch the ground.
On inhale, hold
yourself together, press your palms into the ground, engage your core and
lift your body off the ground.
Come
back into Boat Pose for another
five breaths, then take the lift again.
Do this for
five reps.
|
|
3.
|
Side
Plank
|

Stay
here for five deep breaths. Keep your core strong and
steady. Do this for five reps every
side.
|
|
4.
|
Crow
|

This pose works your
abs and your upper body.
Begin Garland Pose. Place your palms on the
ground in front of you. Spread and press your fingers as wide as you can.
Straighten your legs
slightly, and place your knees as high up onto your triceps as possible, toward
your armpits.
Lift one foot off
the ground and then the other. If you can, bring your toes together.
Squeeze your knees
together slightly and pull your belly button in toward your spine.
Stay
here for five breaths.
|
|
5.
|
Headstand
B
|

This pose require upperbody strength and balance. Keeping your feet parallel
with the ground and also insanely works your core.
Begin with your
hands and knees on the mat. Lower your elbows to the floor and interlace your
fingers.
Place the back of
your head against your palms and the top of your head on the mat. Once your head and forearms feel stable, straighten both legs
and walk your feet toward your face as far as you can.
Shift your hips over your shoulder, and keep your elbows planted firmly on the mat. Lift your right leg straght up toward the sky and then your left, coming into full headstand. If you feel up to the challenge, you can try lifting both legs up simultaneously.
To move into Headstand B, slowly lower both legs down halfway, so that your thighs are parallel with the floor. After five breaths, lower your feet all the way down to the ground.
|